For a long time, I assumed that beautiful flat lays were basically impossible without a room full of natural light. I pictured big bay windows, soft afternoon glow, all the things I don’t actually have in my space. So I put off flat lay photography for way longer than I needed to, waiting for the “right” light that was never really going to show up on my schedule.
What actually changed things was building a small setup at home that doesn’t depend on the sun at all. Once I had a reliable lighting source I could control, flat lays stopped being this fussy, weather-dependent thing and became something I could shoot any time, any day, regardless of what was happening outside my window. This post walks through exactly what I use, including the equipment that I have found most helpful, and lets me shoot without natural light at all.

This post contains affiliate links. If you purchase through one of these links, I may earn a commission at no additional cost to you.
Do You Need Expensive Equipment for Flat Lay Photography?
Short answer, no. I want to get this out of the way early because it’s easy to look at flat lay content online and assume everyone is shooting with a five thousand dollar setup.
What actually makes the biggest difference is lighting and positioning, not the camera you’re holding. A well-lit, well-composed flat lay shot on a phone will always beat a poorly lit one shot on a professional camera. Once you understand how to position your light source and your camera above the scene, you can get genuinely good results with very modest gear.
That said, I do think it’s worth investing in a few key pieces once you know you’re going to keep doing this regularly, which is what the rest of this post covers.
The Camera and Lens I Use
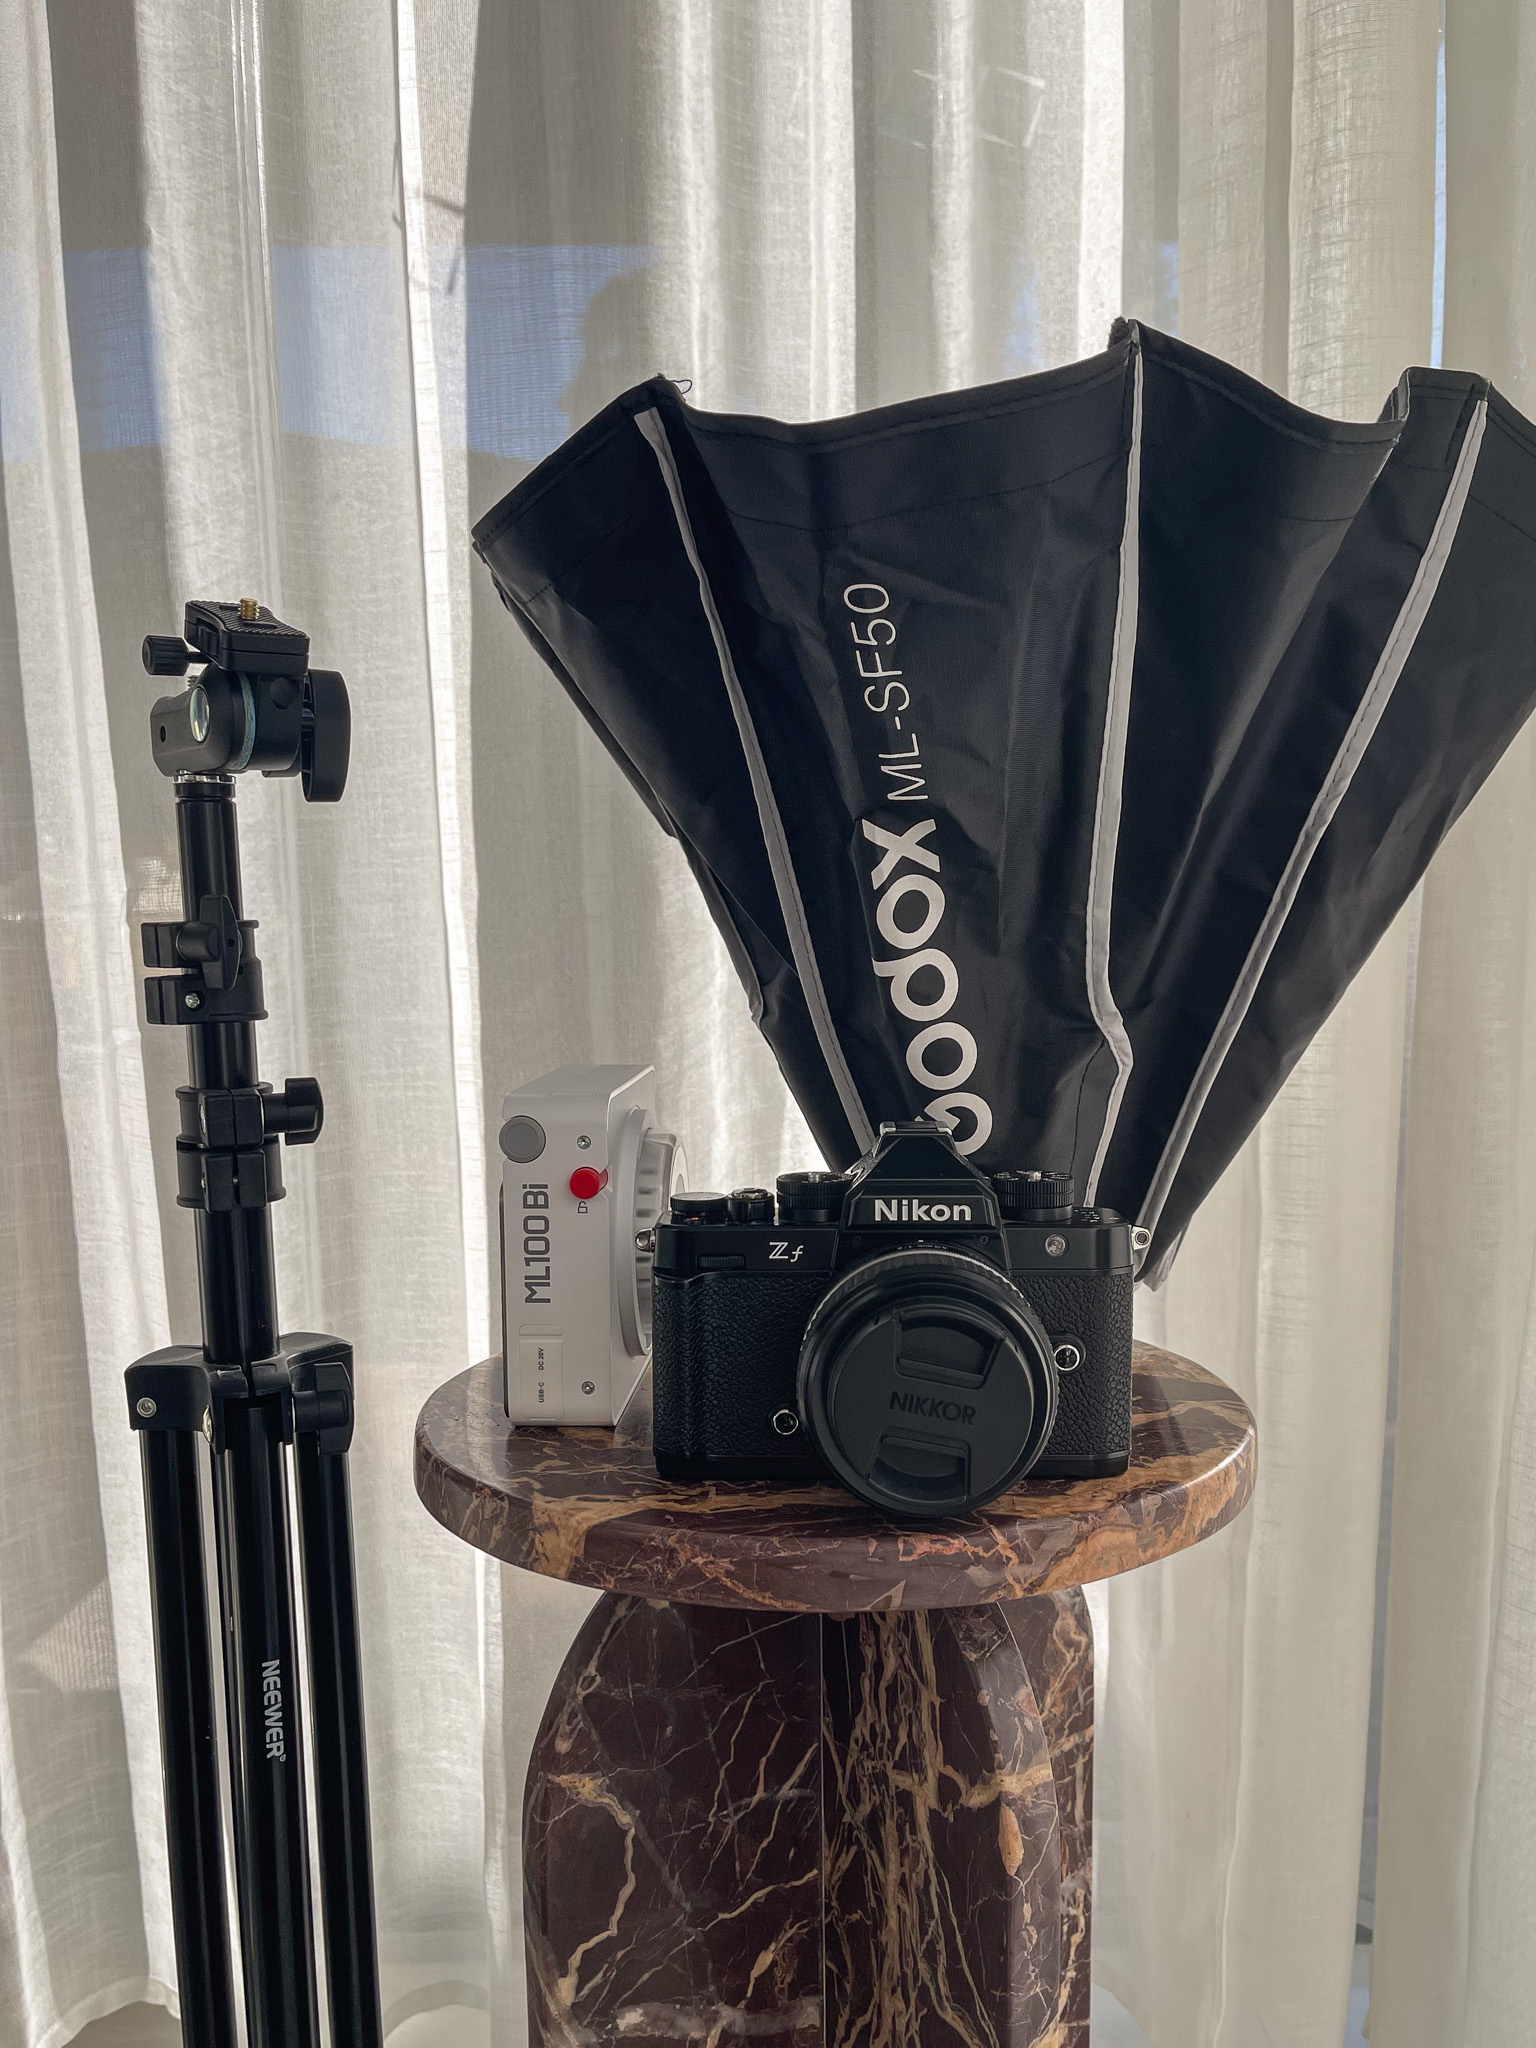
I shoot with a Nikon Zf and a 40mm lens, and it’s honestly become one of my favourite parts of my content process. The 40mm gives me a natural, slightly compressed look that suits flat lays well, it doesn’t distort the edges of the frame the way a wider lens can, so items near the corners of my shot still look true to scale.
While I love this camera, it is absolutely not something you need to buy specifically for flat lay photography. Good lighting and careful positioning will make a much bigger difference than upgrading your camera, particularly when you are just getting started.

If you’re not ready to invest in a dedicated camera, your phone is genuinely a great starting point. Most modern phones handle flat lay photography well, especially once you’ve got good lighting sorted, which matters far more than the device itself. I’ve got a full breakdown of shooting flat lays on a phone linked at the end of this post if that’s where you’re starting out.
How I Position My Camera for Flat Lays
Positioning the camera directly above a flat lay is one of the trickiest parts of the process, and it took me some trial and error to find a method that worked with the equipment I already owned.
Most of the time, I just hold the camera directly above what I’m photographing. It sounds basic, but it works, especially for quick shots where I’m not fussing over perfect symmetry, and I always have the wrist strap secure. For anything I want more control over, I put my regular tripod on an angle and lean it over the flat lay instead of using a specialty overhead arm.
It is not the most elegant or stable solution, which is why I would recommend an overhead arm if you photograph flat lays regularly. My regular tripod still doubles as, well, a regular tripod, for portraits, video, or anything else I need it for.
A few things that make this method work better:
- Extend the legs unevenly so the tripod naturally leans toward your flat lay rather than fighting the angle
- Loosen the centre column if your tripod has one, so you can angle it down without straining the joints
- Go slow when framing. It takes a bit more fiddling to get the camera level and centred than it would with a purpose-built overhead arm, but making use of the ‘Virtual horizon’ on your camera, or ‘Level tool’ on your phone, can help confirm you’re straight
If you’re shooting flat lays often and want something a little more stable, an overhead tripod arm is worth looking into eventually. This one by Neewer is a great place to start with phones and small cameras. But if you’re just starting out, don’t feel like you need one, a regular tripod leaned on an angle, or simply holding the camera by hand, will get you a long way.
The Lighting Equipment I Use
This is really the section that changed everything for me. I use a COB (chip-on-board) continuous light on a light stand, with a softbox attached to diffuse it. This setup is what allows me to shoot flat lays completely independent of natural light, at any time of day, in any weather.

A few reasons I prefer artificial lighting now, even on days when the sun is cooperating:
- Consistency. My lighting looks the same in every shot, which matters a lot when you’re building a cohesive feed or blog aesthetic
- Control. I can adjust the angle and intensity to avoid harsh shadows or blown highlights, rather than working around whatever the sky happens to be doing
- Flexibility. I can shoot in the evening, on overcast days, or whenever content actually needs to get done, instead of waiting for a weather window
The softbox is doing a lot of the work here. It softens the light so you don’t get that harsh, direct look, similar to what an overcast sky does naturally, except I can create it on demand.
Backgrounds and Surfaces
I rotate through a few different surfaces depending on the mood I’m going for. A large white board is my most-used background, it’s clean, versatile, and works for almost anything I’m styling. Beyond that, I keep a small collection of fabric backdrops and textured paper backdrops on hand for when I want something a bit warmer or more tactile.
I also shoot directly on my tabletop sometimes, particularly if I want a bit of natural wood texture to peek through the styling. My general rule is that the background should support the subject, not compete with it, so I tend to keep things fairly neutral and let the styled items do the talking.

Small Styling Tools That Make Flat Lays Easier
These are the unglamorous bits that nobody really talks about, but they make a genuine difference to how polished the final image looks:
- Backdrop Clips for holding fabric or clothing in place so it doesn’t shift mid-shoot
- Tape for securing background edges or keeping paper backdrops flat
- Tissue paper for adding volume inside garments or bags so they hold their shape
- A lint roller because nothing pulls focus like stray fluff on dark fabric
- A garment steamer for anything with creases, wrinkled clothing reads as messy no matter how good your lighting is
- Foam board as a cheap reflector, angled to bounce light back into shadowed areas
None of these are expensive, but they solve real problems that show up the moment you start shooting.
My Basic Flat Lay Photography Process
My process has become pretty repeatable at this point, which is part of what makes it easy to keep up with content:
- Choose the background based on the mood or colour palette I’m working with
- Set up my lighting, adjusting the softbox angle so shadows fall softly rather than sharply
- Position the camera directly above the scene, either handheld or with my tripod leaned over on an angle, and use the levelling feature (Virtual Horizon on my Zf, or the Level tool on iPhone) to check I’m straight
- Style the flat lay, starting with the largest items and working down to smaller details
- Take test shots, checking for shadows, stray shadows from my own hands, and overall balance
- Shoot the final images, usually a handful of variations with slightly different styling
- Edit, adjusting exposure, white balance, and cropping before the image is ready to use
Having this sequence down means I’m not reinventing the process every time I want to shoot, which has made flat lays a much less daunting part of my content routine.

What I Would Buy First on a Smaller Budget
If you’re just starting out, you don’t need everything in this post at once. Here’s the order I’d prioritise:
- A COB light and stand with a softbox — this is the single biggest upgrade you can make, and it’s what frees you from relying on natural light
- A simple background — a large white or light-coloured board covers the most ground
- Basic styling tools — clips, tape, and a lint roller cost very little and solve real problems immediately
- An overhead tripod arm, if flat lays are a big part of what you shoot — I personally get by with a regular tripod leaned on an angle, but if you’re shooting flat lays often and have the budget, a dedicated overhead arm will save you time and hassle. If flat lays are just one of many things you photograph, I’d hold off and put that money toward gear that works across more of your shooting
The camera itself would be the last thing I’d upgrade. Your phone will take you a long way once the lighting and positioning are sorted.
A More Affordable Flat Lay Photography Setup
Once you know which pieces to prioritise, you can build a functional flat lay photography setup without buying the exact equipment I use. If you are working with a smaller budget, focus first on creating soft, consistent light and finding a stable way to position your camera or phone above the scene.
For most beginners, the phone you already own is a perfectly good place to start. Pair it with an overhead phone holder or a basic tripod, and you will solve one of the biggest practical problems straight away.
For lighting, look for a simple continuous LED photography light with adjustable brightness. It does not need to match the output of my Godox light, but it should be bright enough for your shooting area and compatible with a softbox or diffusion panel. This budget friendly lighting kit from Abeststudio includes adjustable LED lighting, softboxes and stands, making it a practical all-in-one option for beginners who do not want to buy each component separately. It will not be as compact or powerful as my Godox setup, but it provides everything needed to start experimenting with soft artificial light at home.
A large sheet of white foam board is also one of the cheapest and most useful items you can buy. It works as a clean background and can double as a reflector when you need to bounce light back into darker areas.
Other inexpensive tools that are genuinely useful include backdrop clips, masking tape, a lint roller, tissue paper and a basic garment steamer. None of these are exciting purchases, but they make the styling process much easier.
My Recommended Flat Lay Photography Kit
My Current Setup
- Nikon Zf
- Nikkor Z 40 mm lens
- Godox ML100Bi continuous light
- Godox ML-SF50 softbox
- Neewar light stand
- Basic camera tripod
Budget-Friendly Alternatives
- Overhead phone holder — Neewer articulating desk-clamp arm
- Basic adjustable tripod — Lightweight Camera Mount Tripod
- Entry-level continuous LED light
- Small softbox or diffusion panel
- White foam board
- Backdrop clips — 12 Pack Spring Clamps
- Masking tape
- Lint roller
- Garment steamer
Final Thoughts
If there’s one thing I’d want you to take from this post, it’s that natural light is not a requirement for good flat lays, it’s just one option. Once I built a setup that didn’t depend on it, flat lay photography went from something I dreaded scheduling around to something I could genuinely fit into my week.
If you’re just getting started and want to see how far you can get with the gear you already have, I’ve written a full guide to shooting flat lays on your phone, which is exactly where I’d point you if a full setup like this feels like a lot right now.
You might also like: